Renga Record-Breaking Release
Renga Record-Breaking Release
While Russia national football team is performing above all expectations in the World Cup, Renga Software developers release the most feature-rich update of Renga BIM system: 3D object snaps, associative dimensions in drawings, scope box control in plan, automatic room boundaries definition, new functionality of imported objects and many others. Long-awaited release is here!
Now Renga Architecture and Renga Structure allow creating objects in view using 3D snaps. Designer's work is no longer bound to the plane. Using newly implemented functionality, designer can create objects in XYZ coordinates, snapping to the other objects vertexes and edges that placed at any 3D space point. It significantly simplifies the process of building complex 3D objects and speeds up designer's work. Using 3D snaps you can easily create composite steel structures including trusses, space frame structures, and rafter systems; perform good detailing of joints and many other functions (Fig.1).
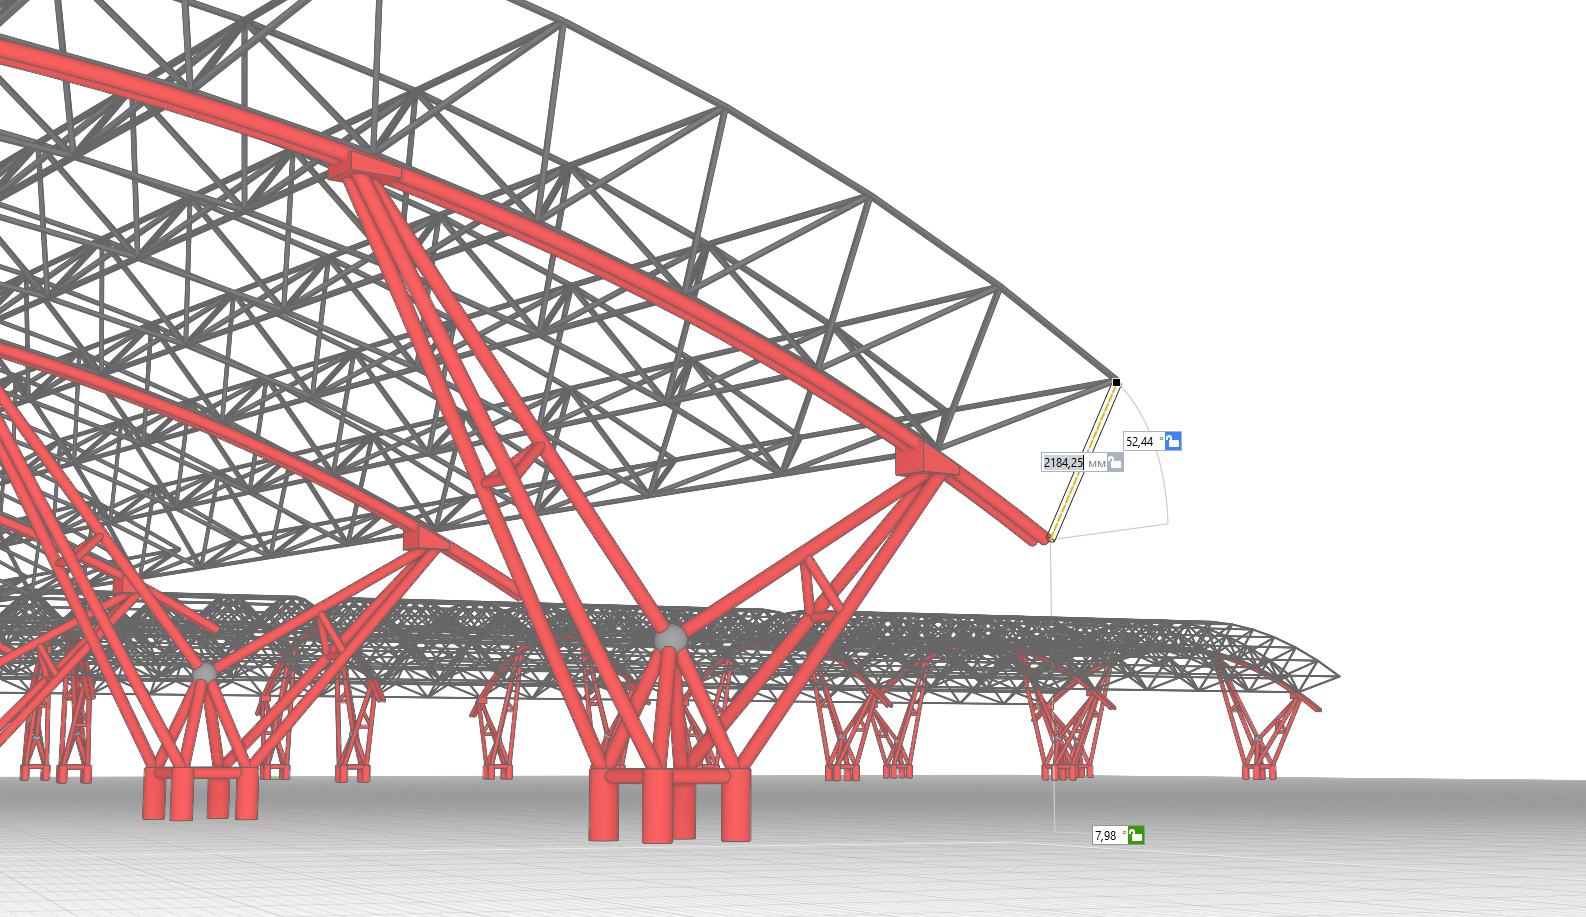
Figure 1. Define beam endpoint using 3D snap.
To activate 3D snaps you need to switch measure mode to three-dimensional using context menu. You can see three measure modes: cubic, spherical and cylindrical. Depending on the selected measure mode, construct an item you need from XYZ coordinates and angle, using a dynamic input field. For easy identification, each dynamic input field has its own color: green for X, red for Y, blue for Z, grey for angle. In Renga you can now create objects with various sorts of snaps and place them in space as accurately as possible. As a result, user designs more complex and interesting objects and structures than before (Fig. 2).

Figure 2. Structural steel system
Renga developers have also implemented a long-awaited functionality for adding dimensions when working in 3D view. Now you can measure the distance between objects to make sure your construction is accurate and add dimensions to object (Fig. 3).

Figure 3. Dimension lines in 3D view.
After that you can activate dimensions placed in 3D view in just one click using new Automatically By View command (Fig.4).

Figure 4. Automatic placing of dimension lines in drawing.
Not only we develop 3D modeling, but also improve usability of drawings. Sometimes you have to make changes to the project after you've already created all documentation. In this release Renga developers have made linear dimensions associative. This feature provides quick and easy 3D model modification. For example, user edits windows, doors or other elements, and Renga BIM system adjusts dimensions in the drawing.
After creating model in 3D mode, you can keep on working on your project in 2D. For example, 2D views can be used when creating drawings of building plans. New release implements an altered plan view display mechanism that allows you to control:
– view depth level (you can select the lower level of the displayed view);
– offset plane (you can select the elevation of the current level where you place a cut plane);
– offset view depth (you can fine-tune your setup by offsetting view depth level relative to selected level).
Manage these parameters in plan view using Parameters panel that is placed right under the Tools panel (Fig. 5). When working with this display mechanism, designer can set view depth parameters and create, for example, first floor layout using a grand floor layout as underlay.
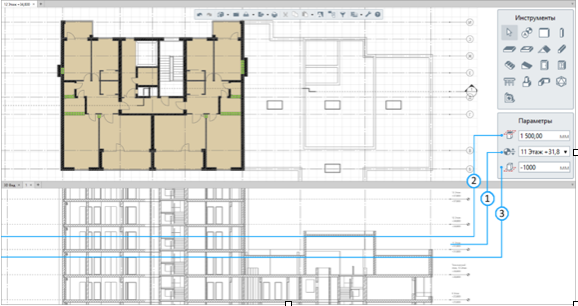
Figure 5. Display properties in plan view.
In previous release Renga developers implemented Element tool, which allows to create and edit styles of elements imported in Renga, and place them in building model afterwards. This release presents a feature for previewing elements in Element Styles menu (Fig.6). Work with elements is getting even easier now, as you can preview and appraise 3D object before you place it into the model.
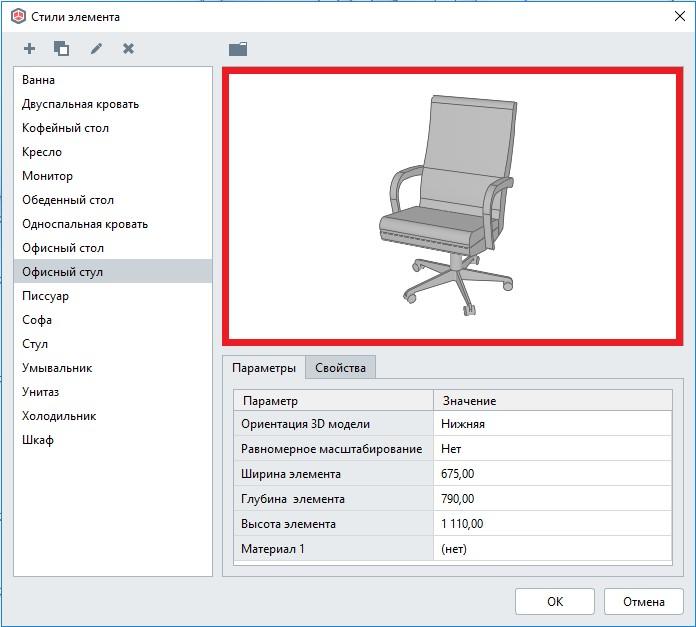
Figure 6. Previewing element in Element Styles menu.
Another new advanced feature of Element tool enables user to work with materials of imported objects. Any solid 3D object can be imported into Renga BIM system along with materials assigned to this object in original program. Working further on his model, user can change these materials and also use imported materials for any other objects (walls, beams, windows, etc.).
Evolving the product by adding new features, Renga developers implemented automatic definition of room boundaries. Renga has now new construction mode Automatically by Point. To enable automatic room creation user only needs to choose this construction mode and click the space bounded by walls and columns (Fig. 7). It would make room associative to surrounding structures and software would instantly define room area. If designer later modifies room configuration in plan, editing, for example, position of structures, this would recalculate rooms automatically.
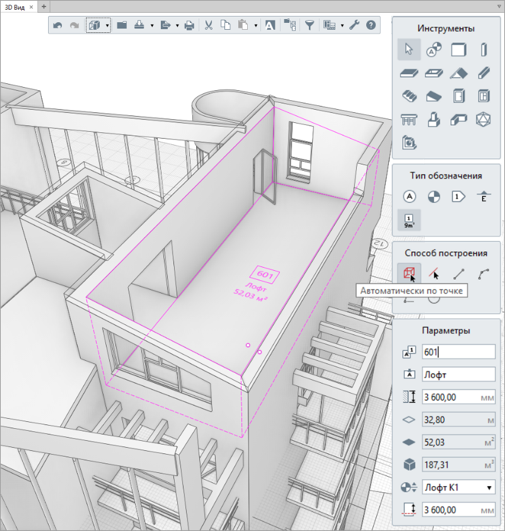
Figure 7. Room created automatically.
Custom properties assignment to 3D objects is one of the key features of building information modeling technology. Apart from assigning custom properties to instances of objects, user now can assign properties to window, door and element styles. For example, you can assign manufacturing company's name to all windows of the same stile at once.
To evolve the product and reduce the time it takes to approve the design, Renga developers implemented functionality for printing from 3D view window and printing from 2D levels window (Fig. 8, 9). Print picture from the screen at a single-click ease and use it at the meeting to make your presentation more efficient.
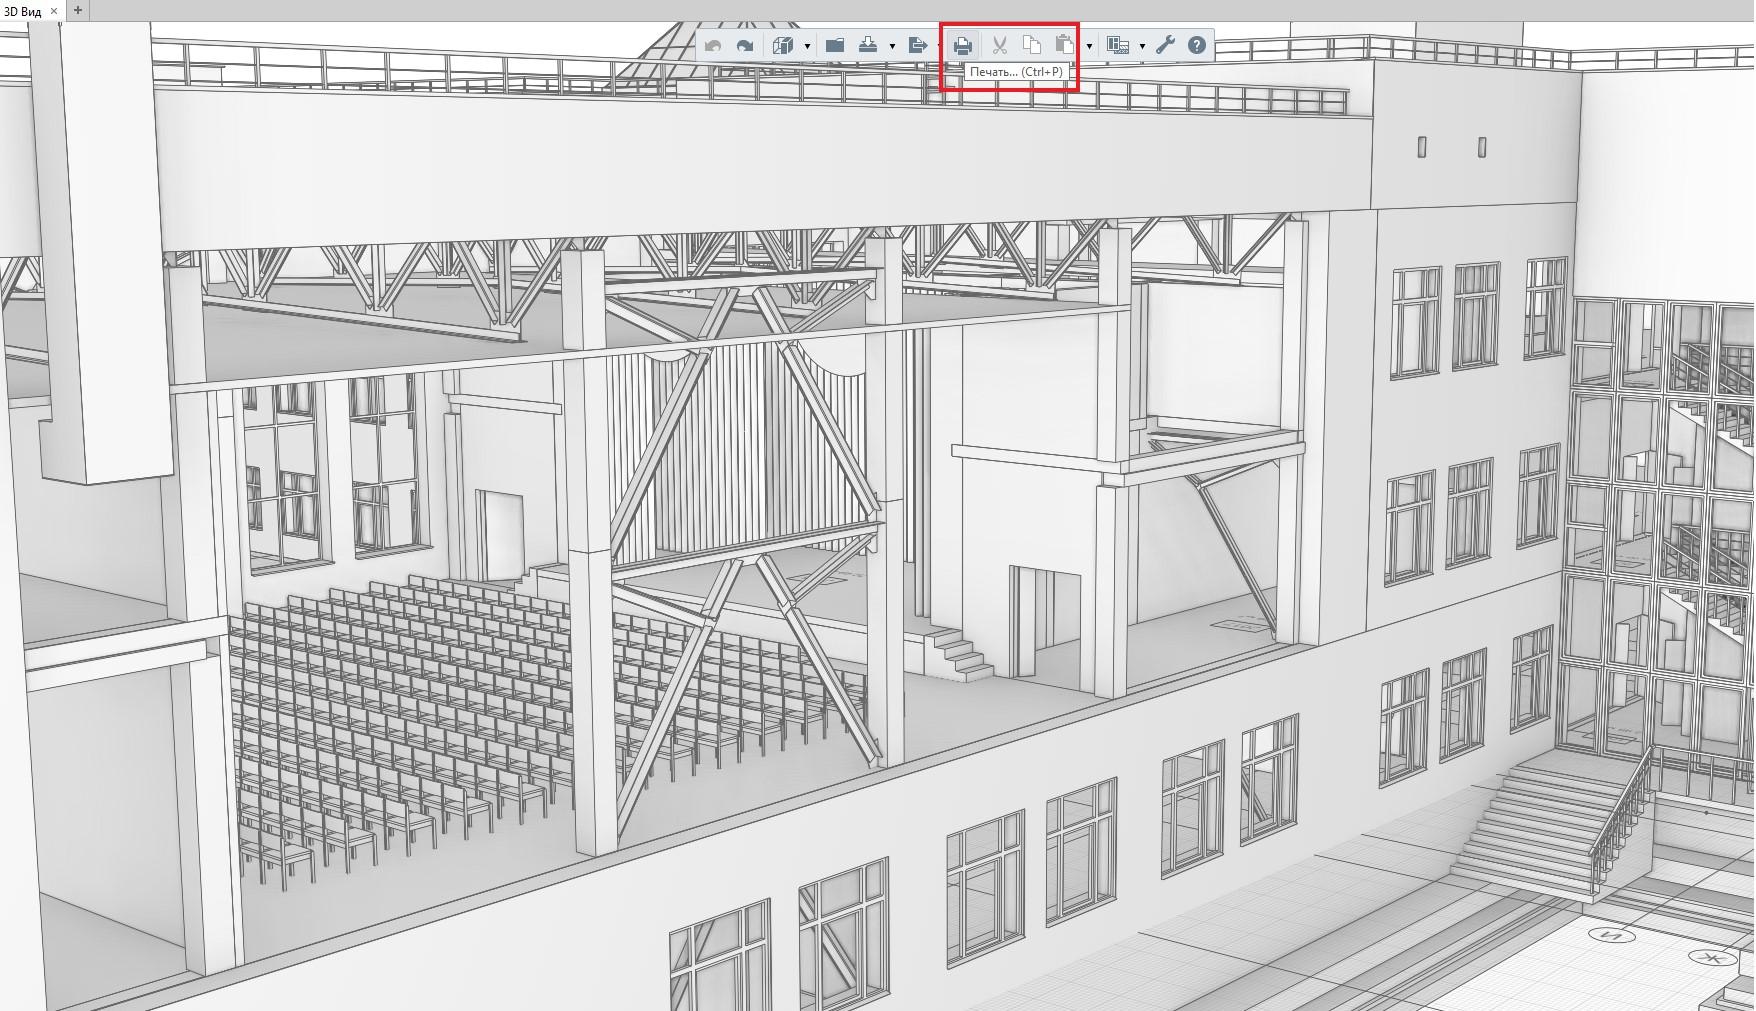
Figure 8. Print in 3D view window.
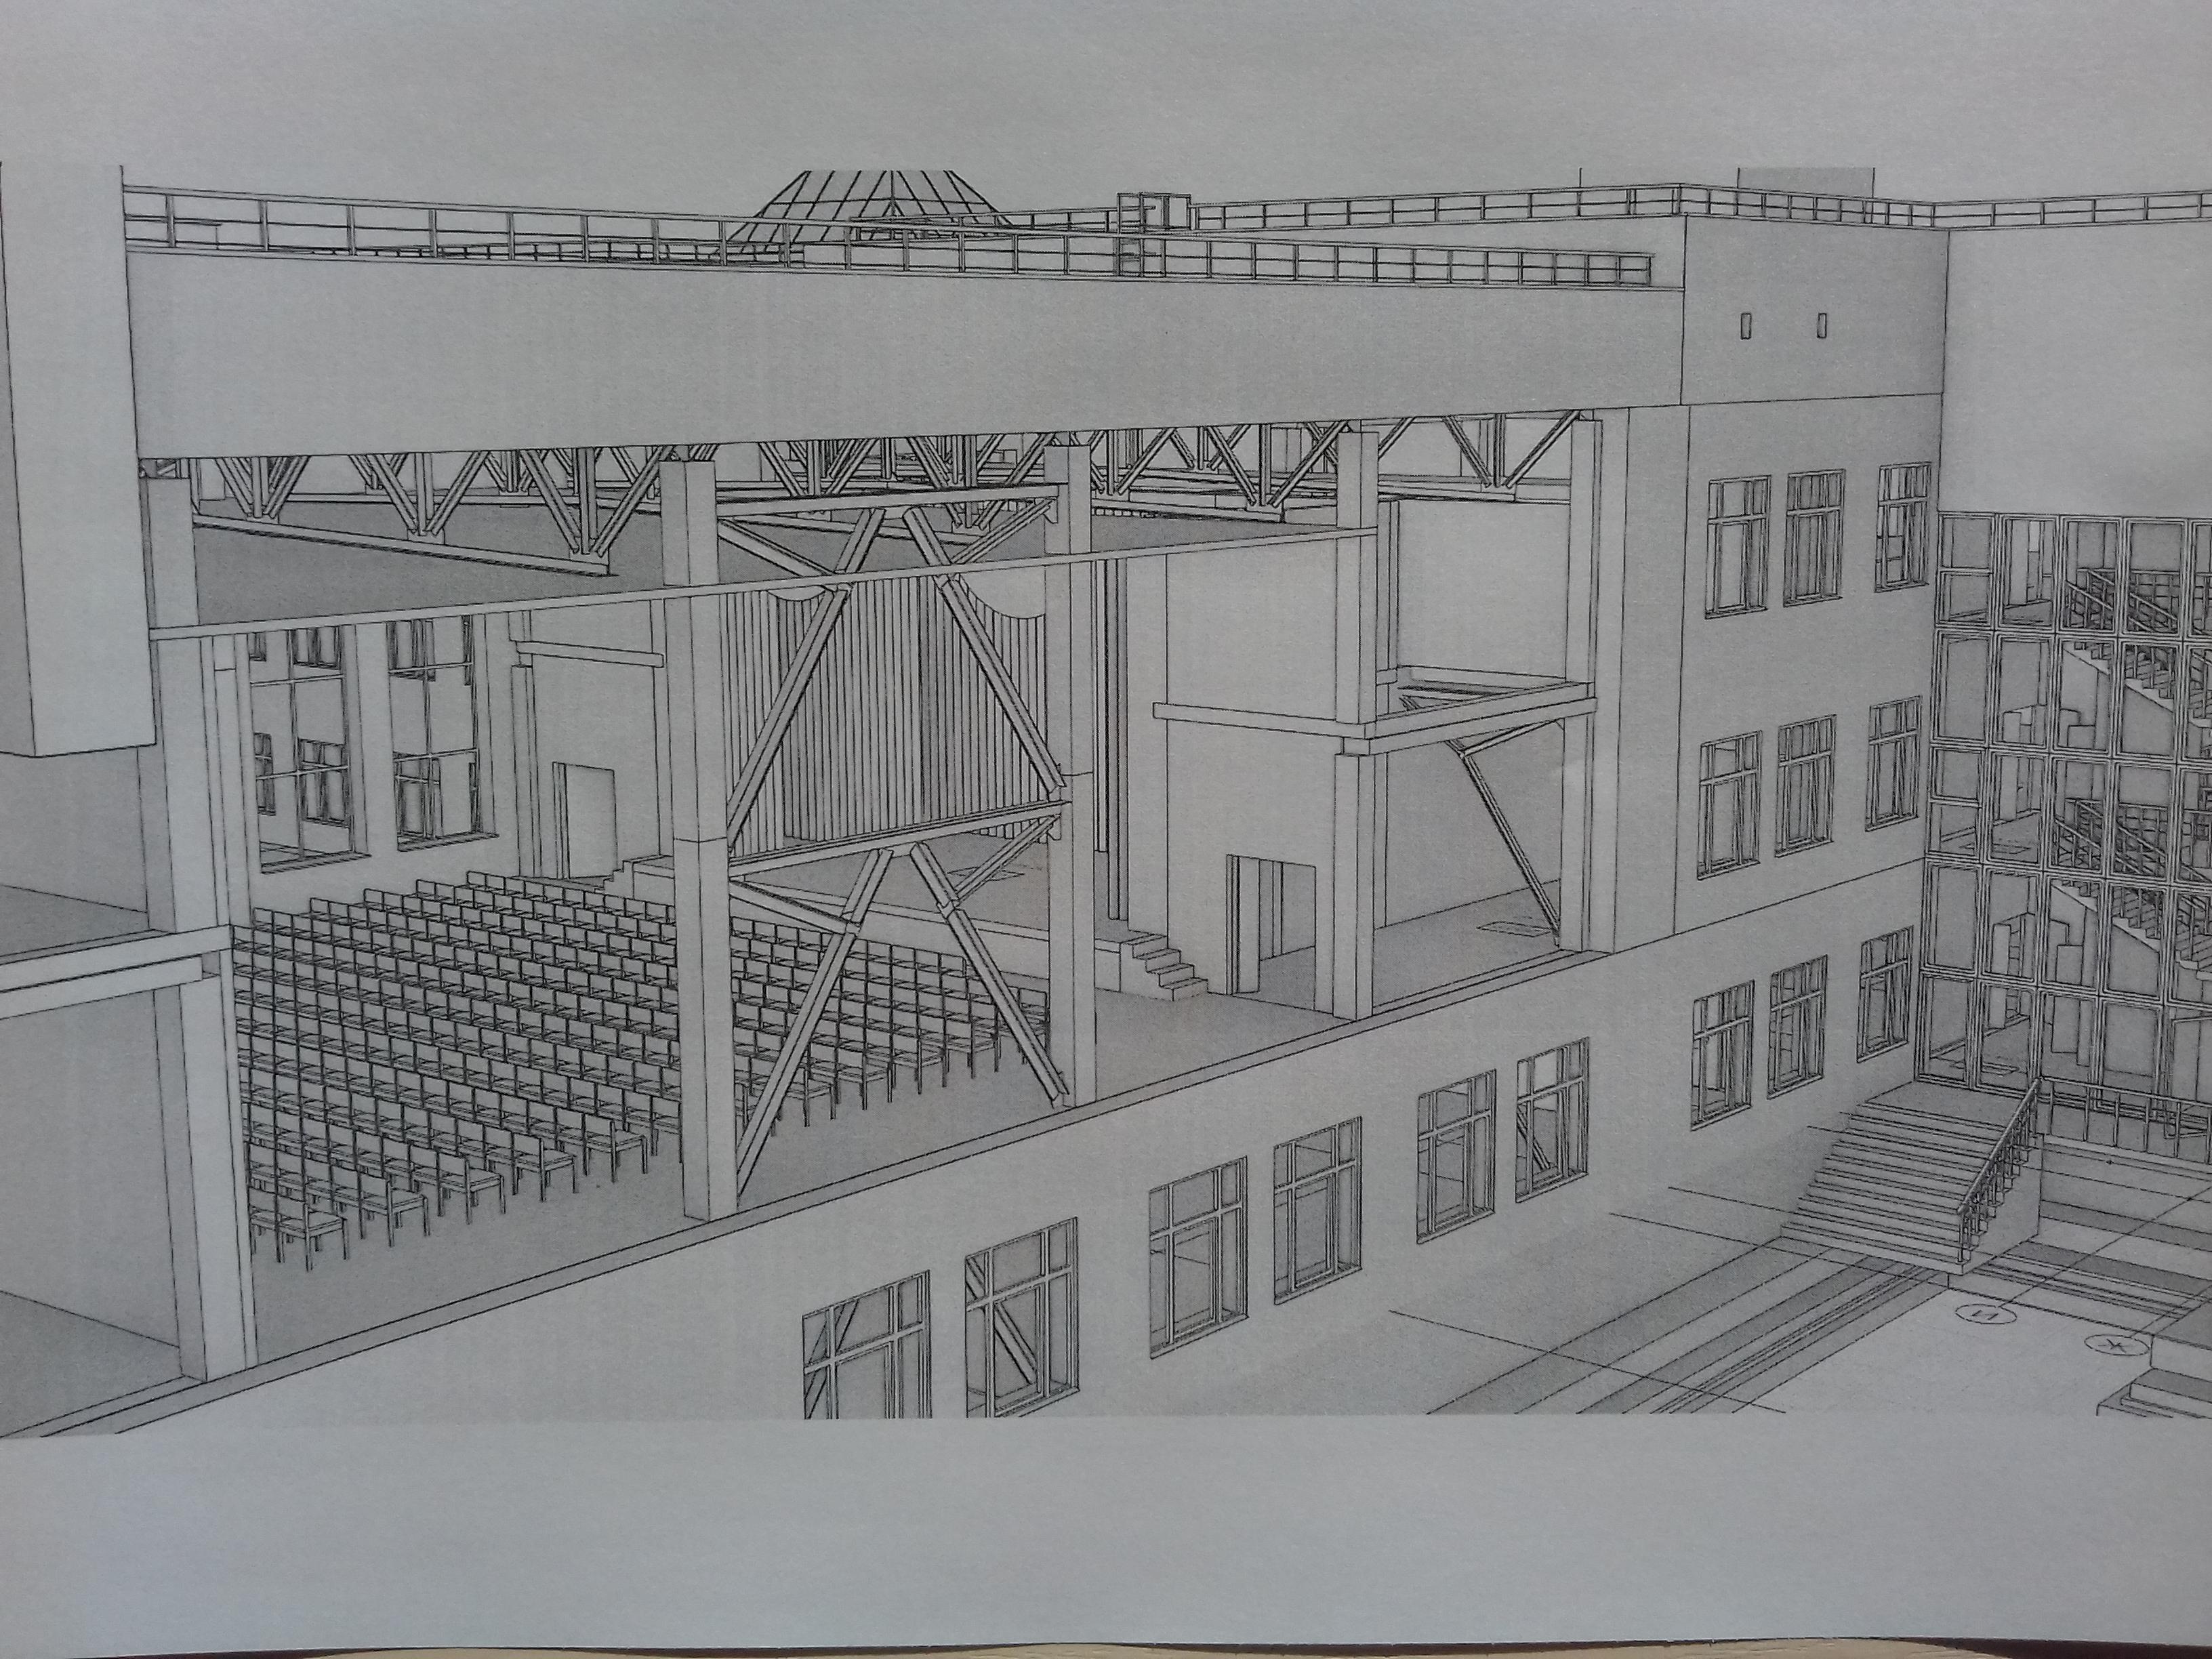
Figure 9. The result of printing 3D view.
This release also provides updated features for door styles. In Door Style window was implemented Parameters panel, where user can assign material to construction of the door (Fig. 10).
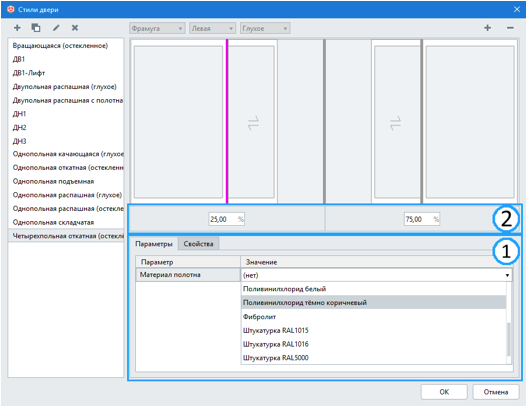
Figure 10. Door Style window.
Section display feature has also been significantly updated. Now compound structures of walls and floors display in views and drawings, showing all designed layers. It allows to generate more detailed section drawings (Fig. 11).
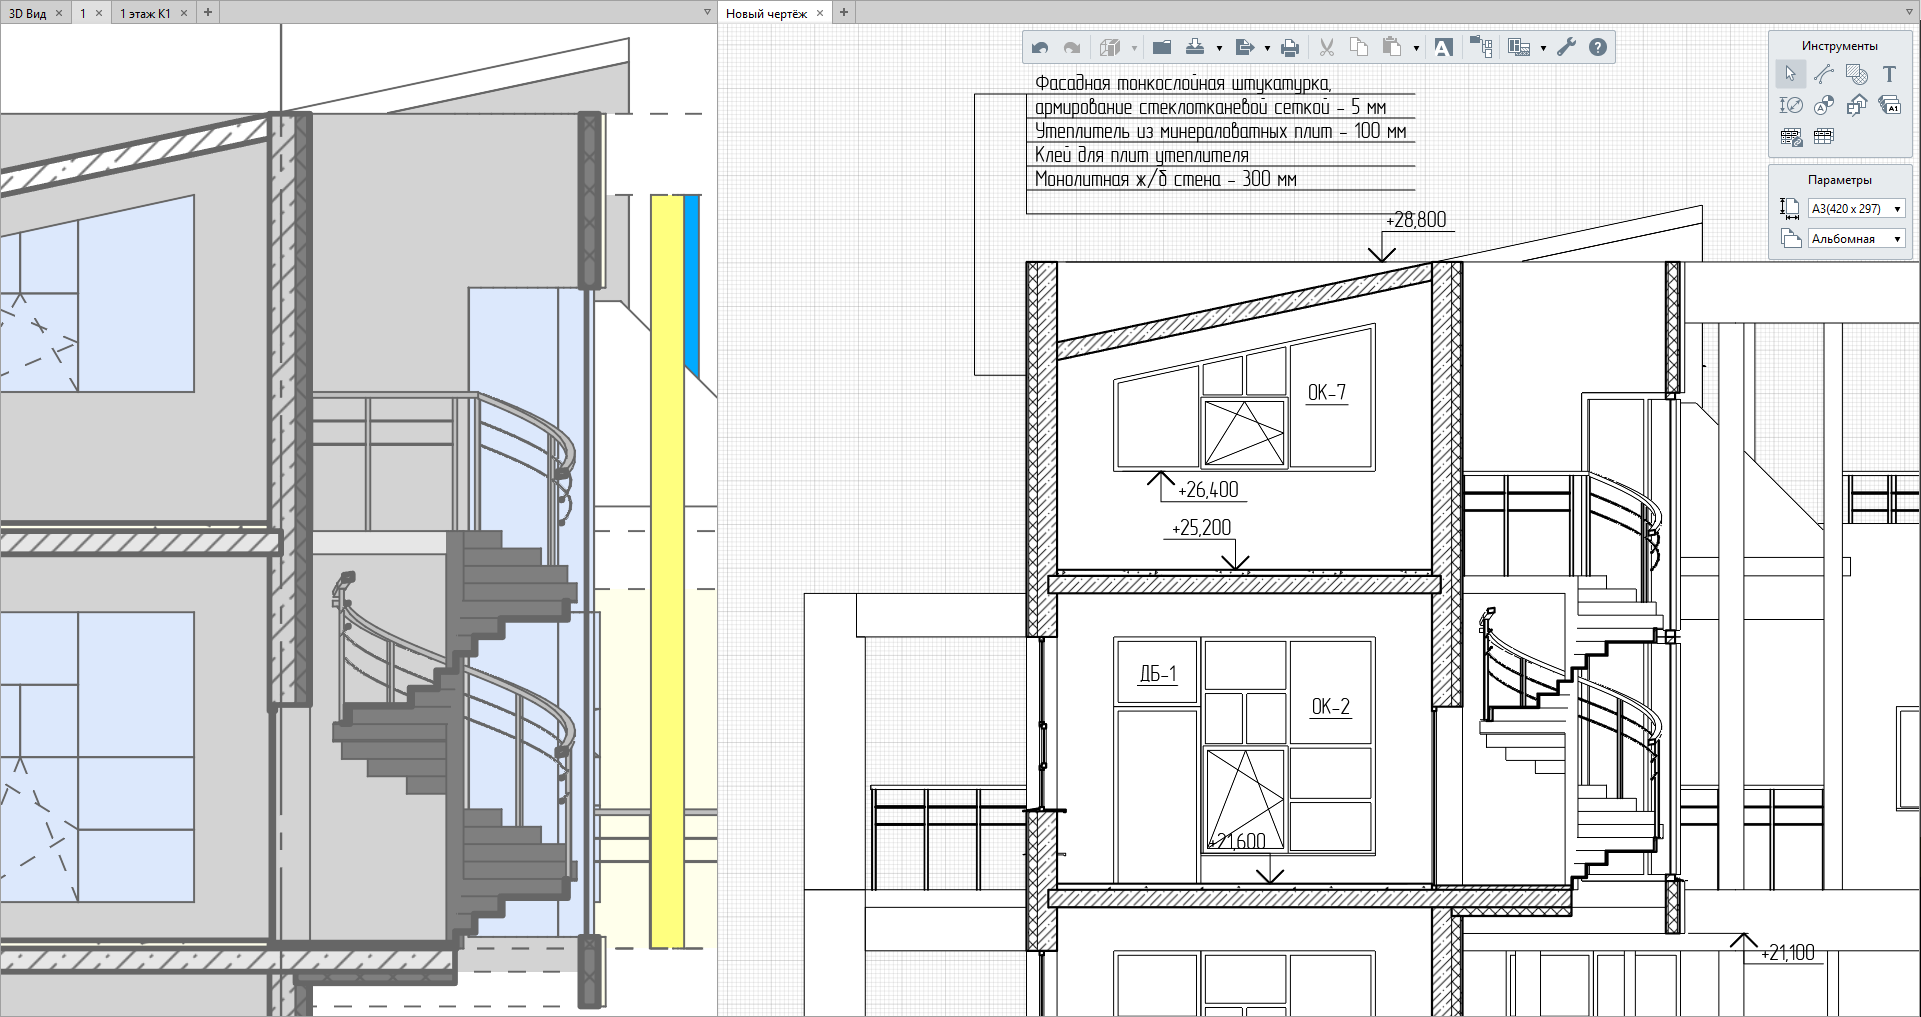
Figure 11. Compound structures on the cut.
With each new release we evolve the product by adding new features and facilitating Renga Architecture and Renga Structure integration to other BIM systems. Using IFC open file format you now can:
– export and import parametric window style. Parametric window definition at the same time allows to edit windows in all IFC-compatible software solutions.
– export and import IFC colors and materials. 3D objects get assigned to materials when importing/exporting. User can easily edit any material properties, such as color, hatching, physical properties etc.
– use support for IFC solid geometry of non-parametric objects. Geometry of non-parametric IFC objects converts into solid one. It provides users with detailed views and drawings.
– use support for importing non-parametric window styles from IFC. Window non-parametric definition from IFC format converts into Renga window styles.
In this article we've introduced you with key features of Renga BIM system summer release. Our developers implemented 36 new features altogether! Users who already downloaded and installed Renga Architecture and Renga Structure can appreciate new functionality by installing system update on our website. For those who still hesitate we offer to download our full trial version of Renga Architecture and Renga Structure right now.
If you want more information watch our ''3D Design, Associativity and 3D Snaps'' webinar. This webinar is hosted by Renga Software experts. You'll see in-depth topic discussion with questions fielded during the presentation. Watch webinar.
What's New Video: 3D Modeling in Renga Architecture, 3D Snaps and Measure Modes
Work with Model: Dimensions, 3D Lines, Printing View
Compound Walls in School Building Project