
Renga Teams Up with Revit
There is no doubt that BIM will shape the future of buildings
Construction industry is increasingly adopting 3D designing and BIM technology. Every reputable building company today at least heard about this technology. Some of them are effectively implementing BIM in project workflows. However we often witness the situation when the same project team of the same company uses different BIM tools.
What kind of difficulties to expect? What to do if designers use different software? How to provide productive building modeling for all project members? Such questions concern everyone planning to begin adoption of BIM.
Communication is a key to success
To this date, using IFC open standard (Industry Foundation Classes) has been pretty much the only way for AEC pros to successfully manage projects, because of its focus on ease of interoperability between software platforms. IFC provides loss-free and efficient data exchange of building data models across different software and facilitates cooperation in the AEC industry. So how does BIM software interaction via IFC work? What difficulties worksharing via IFC may bring? Answers to these questions may perhaps best be illustrated by reference to a practical example.
Let us consider the example of a country house designed by architect and structural engineer who both work in different BIM software solutions. Architectural design of 3D model is created in Revit (developed by Autodesk Company). We at Renga Software have similar app called Renga Architecture (Fig. 1 and 2).
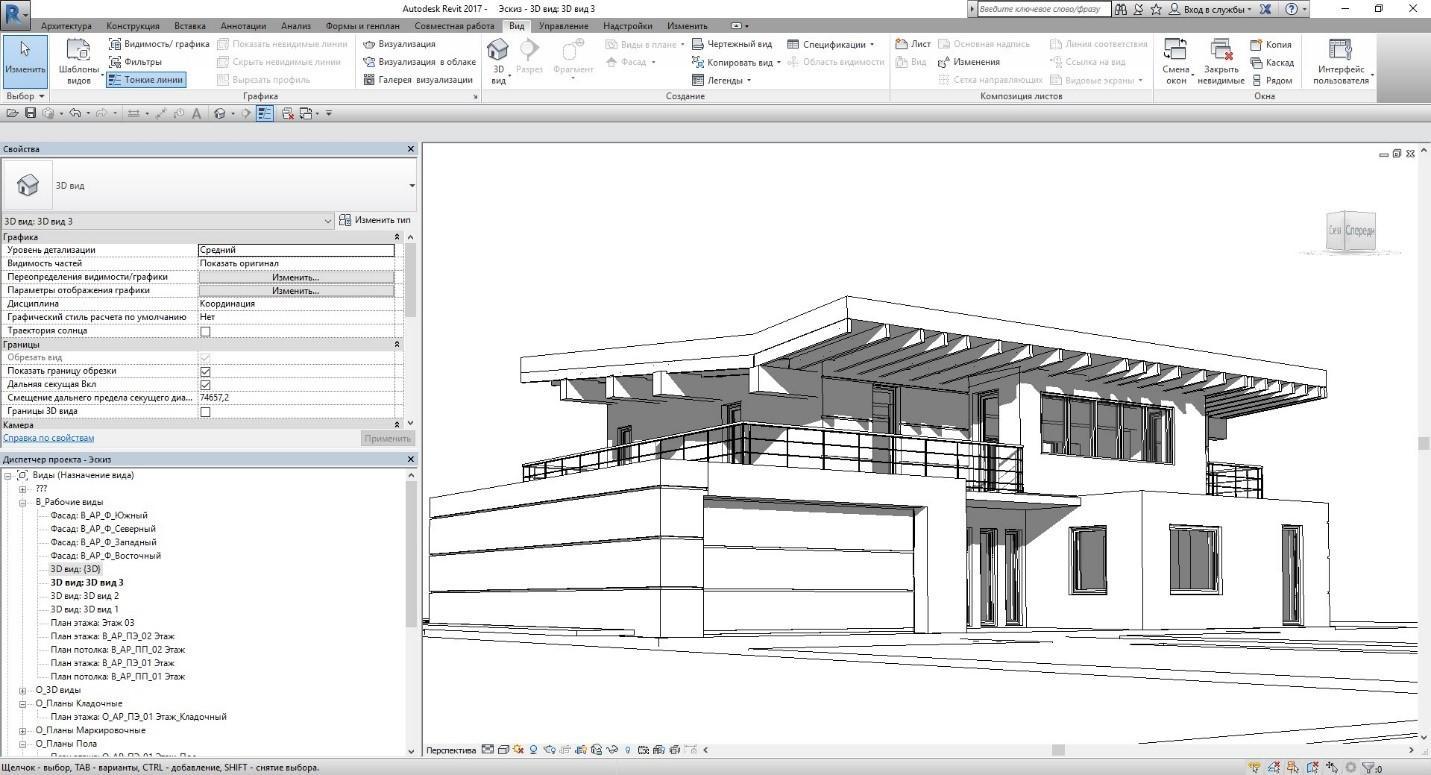
Figure 1. Two-storey cottage model created in Revit
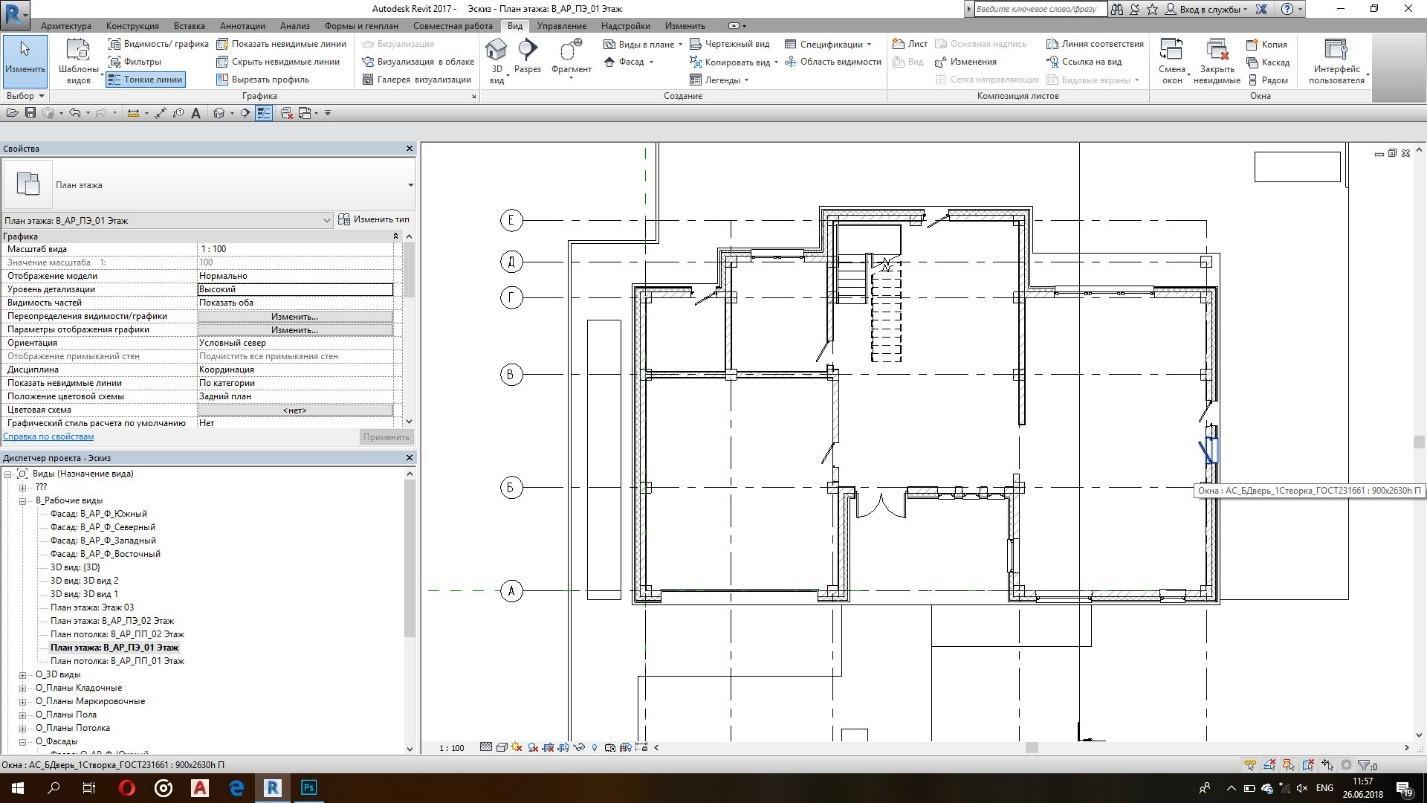
Figure 2. Cottage first floor plan created in Revit
Cottage features a split level shed roof with autoclaved aerated concrete walls and slab foundation. Architect and structural engineer both concurred in the opinion that Renga Structure is a perfect solution for structural design of the cottage. App helps to quickly perform reinforcement works of cast-in-place reinforced concrete elements and automatically generate their drawings and schedules. Architectural 3D model of the cottage transfers from Revit to Renga Structure via IFC format (Fig. 3). High performance and increased efficiency of Renga Software solutions enable fast downloading of IFC model. This capability is an incredible time-saver that simplifies and streamlines project workflow.
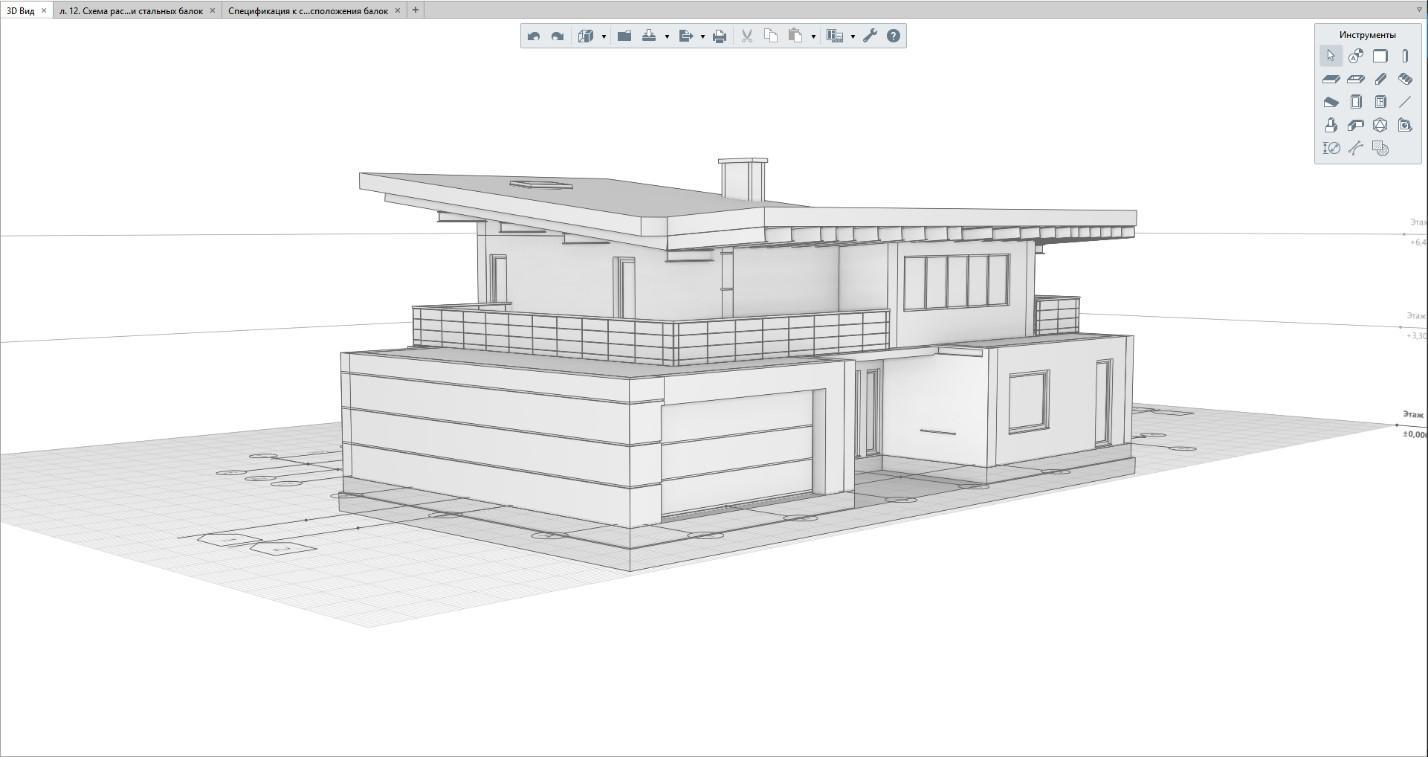
Figure 3. Cottage IFC model in Renga Structure
It must be noted that, when exchanging IFC model from one software to another, some objects are transferred as non-parametric elements with constant geometric and digital parameters. For example, when importing cottage 3D model from Revit to Renga Structure, second floor external walls transfer as non-configurable elements, due to the specifics of IFC format. Because project includes a model with sloped roof, some walls were cropped by roof cladding. As for the cropped objects of 3D model, they also import as non-parametric. All these should be taken into account when working with IFC format.
Renga and Revit team up
Let’s get back to the two-storey cottage project. After structural engineer opens imported model in Renga Structure, he can make required adjustments, such as: replace reinforced concrete rafters with metal ones; change the thickness of foundation slab (Fig.4) and floor slab. Thus, Renga provided all the required adjustments for structures of cottage 3D model imported via IFC format. To verify the structural strength and check structural parts for load capacity and serviceability, designer only needs to transfer cottage 3D model to any optional structural analysis software tool.
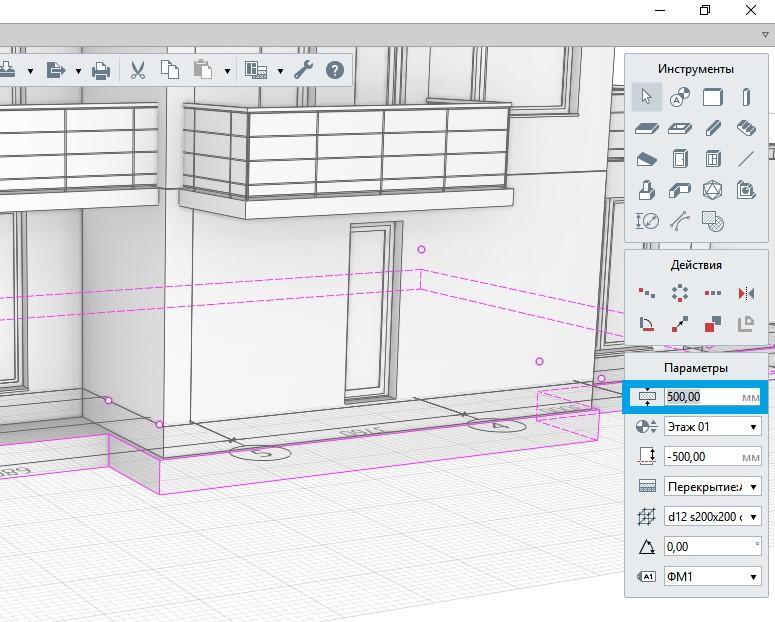
Figure 4. Adjusting foundation slab thickness in Renga Structure
One of the challenges for structural engineer was the reinforcement of cast reinforced concrete structures in Renga Structure.
It’s worth noting that unlike other BIM systems, Renga has two reinforcement methods: automatic and manual reinforcement using individual bars.
Let's go into particulars of the foundation slab reinforcement using Reinforcement Style (this tool provides automatic reinforcement layout in structures). What does Reinforcement Style mean when placed in Renga BIM system environment? It's a set of rules reflected in Russian Federation Construction Rules "Concrete and reinforced concrete structures. General provisions" (SP 63.13330.2012) and implemented in Renga Structure. Parameters of these rules enable Renga Structure automatically distribute rebars in cast reinforced concrete structures. All parameters can be configured by the designer to enhance modeling productivity.
To configure parameters of foundation slab automatic reinforcement designer should do the following:
Step 1. Reinforcement grades.
Before creating Reinforcement Styles designer sets all required rebar grades that got applied in project. In Manage Styles drop-down list designer selects Reinforcement grades (Fig. 5) and specifies Grade name and Tensile strength value (Fig. 6).
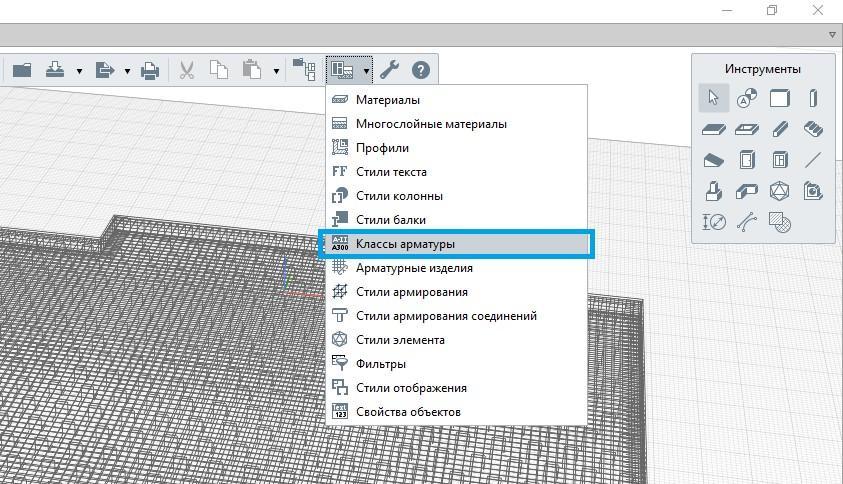
Figure 5. Manage Styles drop-down list
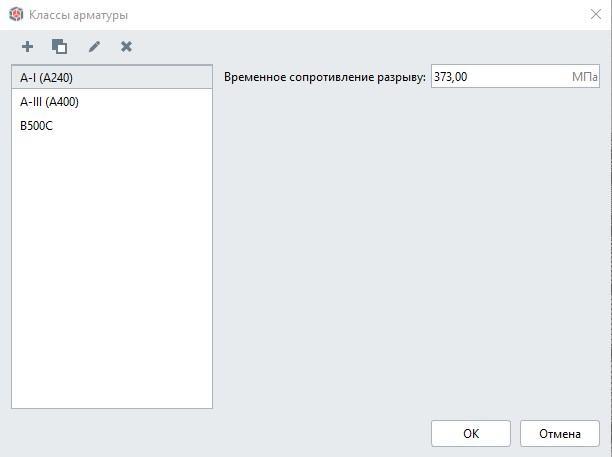
Figure 6. Rebar grades styles
Step 2. Reinforcement units
Renga Structure implements an entirely new approach to reinforcement units workflow, eliminating the need for structural engineers to use content libraries or references. Software already includes all required reinforcement units (in our case rebars). Using Reinforcement units styles tool, structural engineer within seconds creates rebars and specifies their parameters: diameter, grade and material (Fig. 7).

Figure 7. Setting up rebar parameters
Step 3. Reinforcement Styles
Renga Structure offers a unique approach to reinforcement design enabling users to set all required parameters for rebar distribution in a prompt manner. For example, to reinforce foundation slab, designer sets the following parameters for upper and lower reinforcing meshes: selects rebars d12 of A-III grade with spacing of 200 mm, and concrete cover 35 mm thick. For secondary reinforcement designer has chosen locking wheels, specified their spacing and place of reinforcement (Fig. 8)
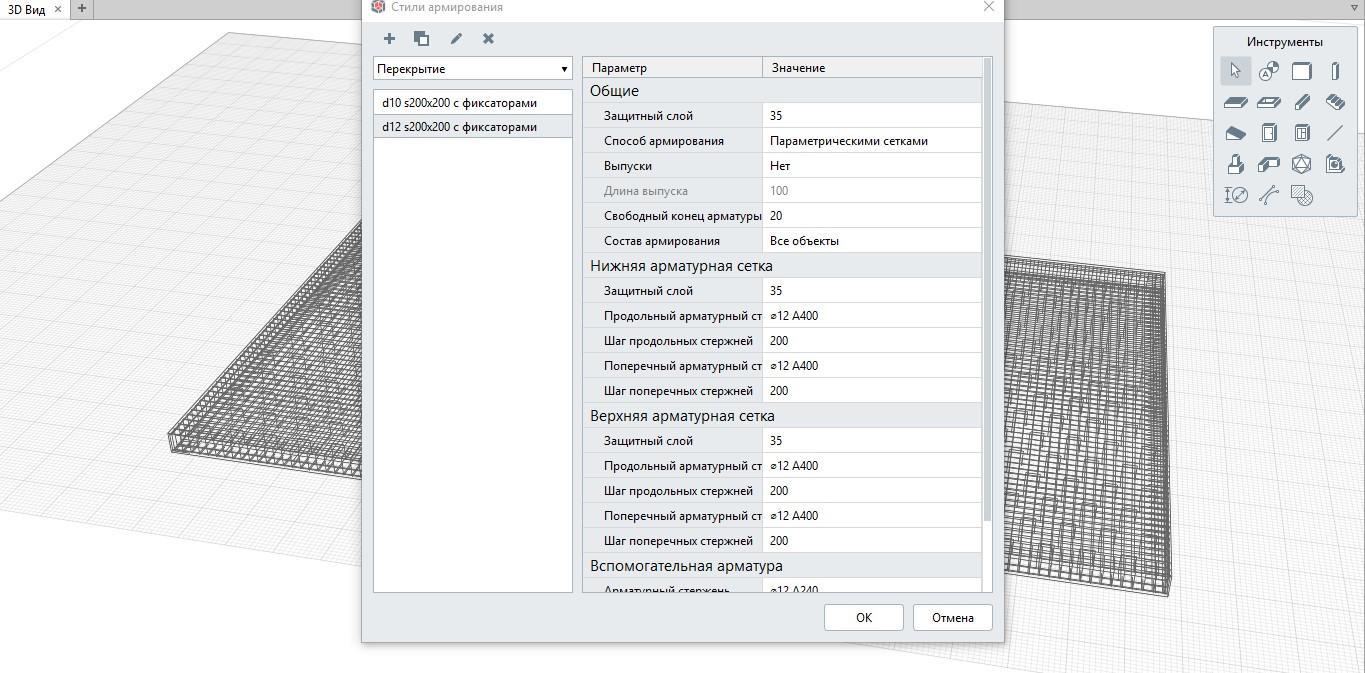
Figure 8. Setting reinforcement styles of foundation slab
Step 4. Automatic reinforcement of objects.
To apply customized reinforcement, structural engineer only has to select the required object and specify needed reinforcement style in object parameters. Software automatically distributes all rebars in slab reflecting the configuration of slab and cover (Fig. 9).
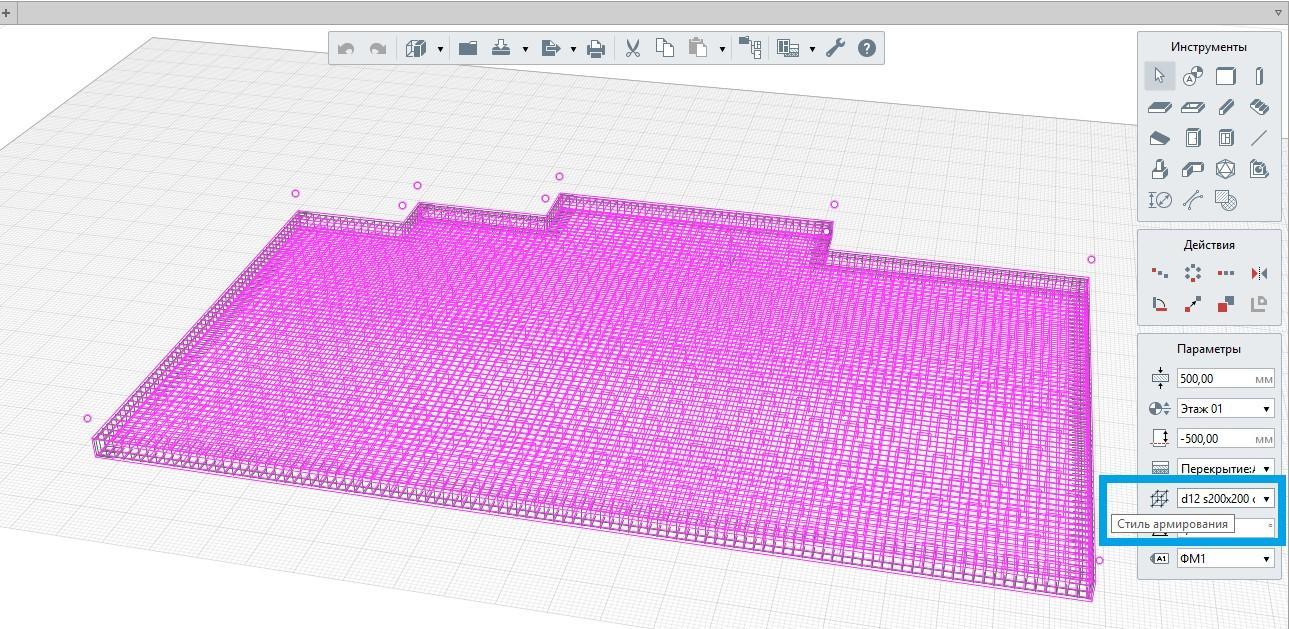
Figure 9. Foundation slab automatic reinforcement
Apart from slab reinforcement, Renga Structure users can successfully perform automatic reinforcement of wall, foundation, beam and column (Fig. 10), opening in floor, window and door opening, structural connection.
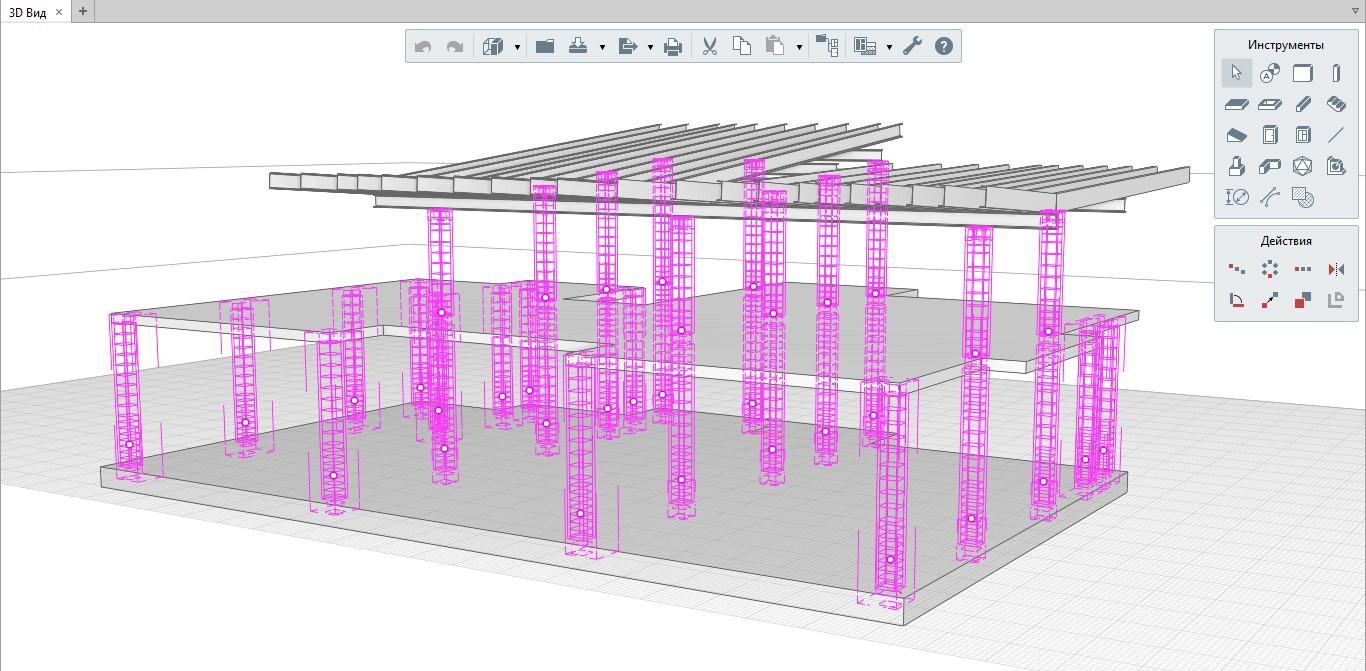
Figure 10. Columns reinforcement
Automatic reinforcement delivers the efficiency and enhancements that will speed up design process of cast reinforced concrete structures. This tool is not only an obvious time-saver and productivity booster, but it helps users do a better job creating the content that captures design intent.
Let's have a close look at the reinforcement of the foundation slab edges. According to SNiP 52-01-2003 (Russian Federation Construction Rules and Regulations for Concrete and Reinforced Concrete Structures) reinforcement of slab edges requires U-shaped stirrups. Structural engineer can apply this type of reinforcement manually by using single bars. Or he can use an alternative option: Select Opening tool and assign reinforcement style to it, then set configuration for opening so that the holes fall only at the outside faces of the slab (Fig. 11). Using these two openings structural engineer successfully managed to reinforce an entire foundation slab contour (Fig. 12).

Figure 11. Apply Opening tool to reinforce outside faces of the foundation slab
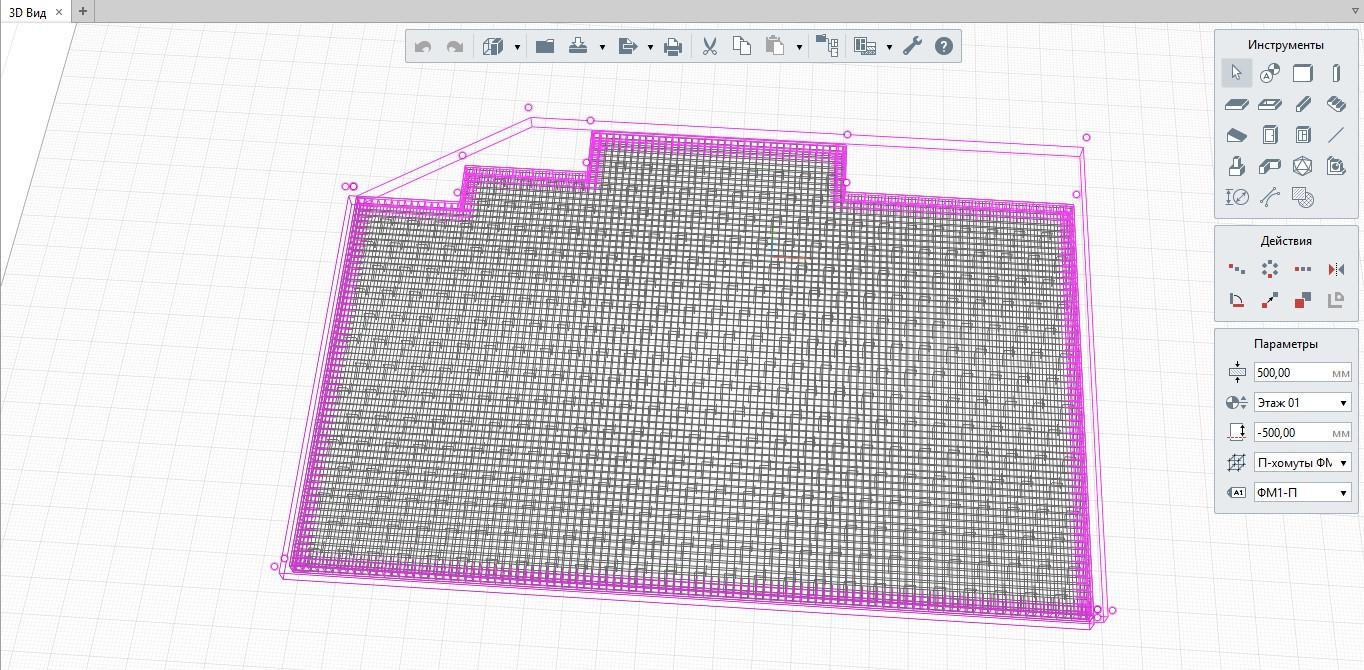
Figure 12. Reinforcement of the foundation slab contour
If necessary, export adjusted Renga Structure cottage model back to IFC format and share it with the rest of the team. All the updates and adjustments will be correctly displayed in other BIM software.
With new and enhanced Renga Structure functionality users will be able to create more accurate and readable drawings for structural design. Structural engineer can select required 2D views in Renga Structure and easily place them on sheets (Fig. 13). And use annotation tool to dimension, tag, designate and add callouts (Fig. 14) to semi-automatically generate drawings.
Renga Structure generates all documents according to the standards of Russian System of design documents for construction (SPDS) and International Organization for Standardization (ISO).
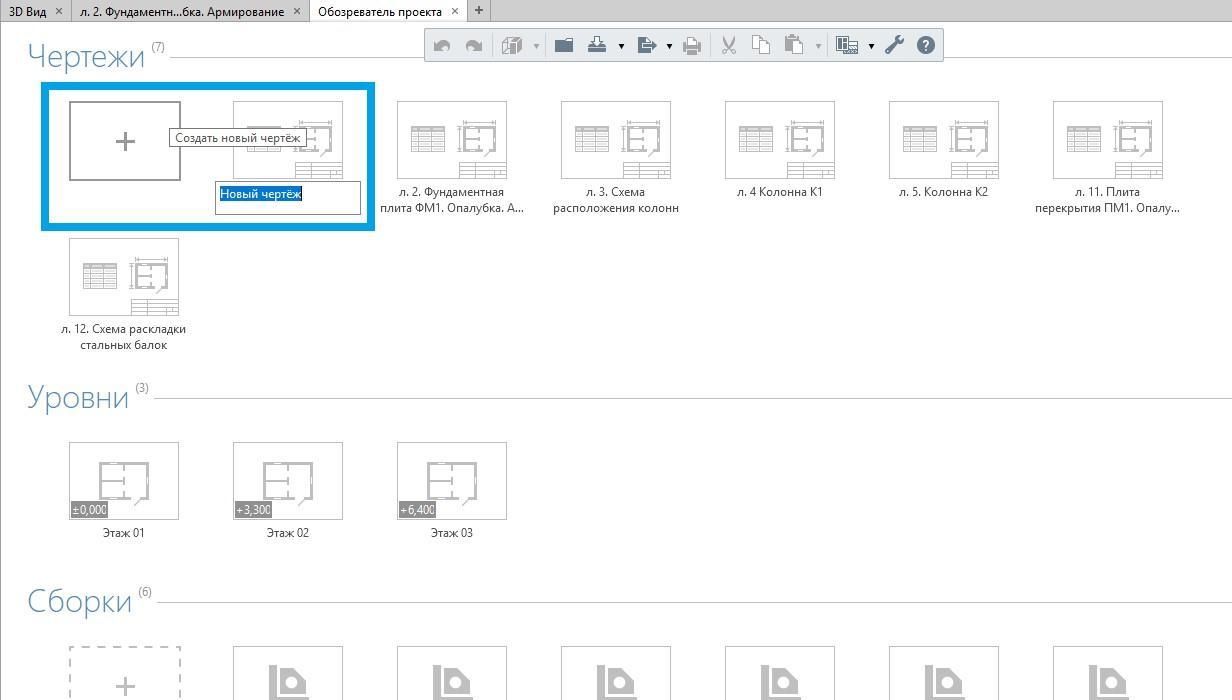
Figure 13. Create new drawing in Project Explorer

Figure 14. Production of the reinforced foundation slab drawing using Renga Structure editing tools.
It is necessary to say that Renga Structure drawings are associative to building 3D model. Therefore all the updates and modifications display on drawings as well. So there is no time wasting for structural engineer in case of design adjustment. App automatically updates all documents.
Apart from foundation slab, reinforcement has been made to floors and columns of the cottage. If you want more information on how to reinforce columns, generate drawings, create joints etc watch our ''Renga & Revit. Worksharing environment for architects and structural engineers" webinar. This webinar is hosted by Renga Software experts. You'll see in-depth topic discussion with questions fielded during the presentation. Watch webinar.
By Darina Sergeeva, Renga Software Product Manager